My heat pump journey part one: preparation
How I made my home heat pump ready, even though it's nearly 100 years old.
I’ve been writing about heat pumps for years, but that was theory, this is practice.
My home is an ordinary 1930s end-of-terrace house. Was a heat pump possible? Would it cost a fortune? Would I need new radiators and plumbing? And would I save on energy bills?
This is the first in a series of six articles on what it’s really like to replace your gas boiler with an air source heat pump. Read on to find out about preparing for a heat pump…
Why get a heat pump?
I’ll focus on how to make a home heat pump ready. But first, let’s talk about why you’d want to. Put simply: a heat pump will cut your carbon emissions and hopefully save you money, but only if your home is ready for it.
A heat pump replaces your gas boiler – it uses electricity to heat water in a big tank, but rather than heat the water directly, it takes heat from outdoors and brings it indoors.
The easiest way to explain the tech is to say that a heat pump works like an air conditioning unit in reverse, or like the technology used in fridges: it moves heat energy from one place to another by compressing and expanding a refrigerant.
Fridges and aircon units work in all weathers (though efficiency varies) and the same is true for heat pumps.
The technology is really clever. An air source heat pump can take heat from outdoors even in cold weather. And it’s really, really efficient, typically 500% – for each unit of electricity you use, you get five units of heating.
In comparison, gas boilers are about 90% efficient. So even though gas is cheaper than electricity, you could save on bills because you use so much less energy.
If you go whole hog and also get solar panels to generate electricity then your heating is free, as well as green. But you can dodge fossil fuels without generating electricity yourself, just by getting a renewable tariff. Renewables like solar and wind power have taken off in the UK in a big way. This should ultimately make electricity cheaper (unlike gas, the supply is infinite), so long-term you might save even more on energy bills.
How to make your home heat pump ready
The hot water that heat pumps put out is usually around 45-50°C rather than the 65-70°C circulated in gas central heating systems.
This means radiators are warm (but not crazy hot) for longer. It also means heat pumps work great with underfloor heating. But it means that you need good insulation – so that heat isn’t wasted.
Heat pumps are great in modern homes. If your home was built after 1945, it should have cavity walls and hopefully they’re insulated already.
If not, please insulate them – adding the basics like cavity wall insulation and loft insulation will save you money on energy bills fast, however you heat your home.
Modern homes are likely to have good insulation and double glazing all round. And if you’re designing a new home, a heat pump is a great idea.
I’m focussing on air source heat pumps here (they require an outdoor unit to gather heat) but if you’re designing a new build then also consider a ground source heat pump.
These use a system of pipes, buried in the garden, to transfer heat energy from the ground into the home.
They’re more expensive to fit because of the groundworks, but they’re out of sight and they’re even more efficient because the temperature underground is more consistent year-round.
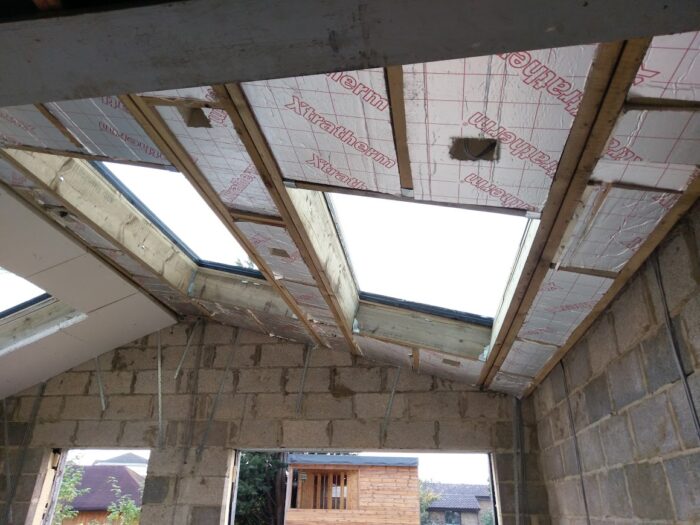
Foil-backed foam insulation was used in the extension roof and under all the floors, between joists
How to make an older home heat pump ready
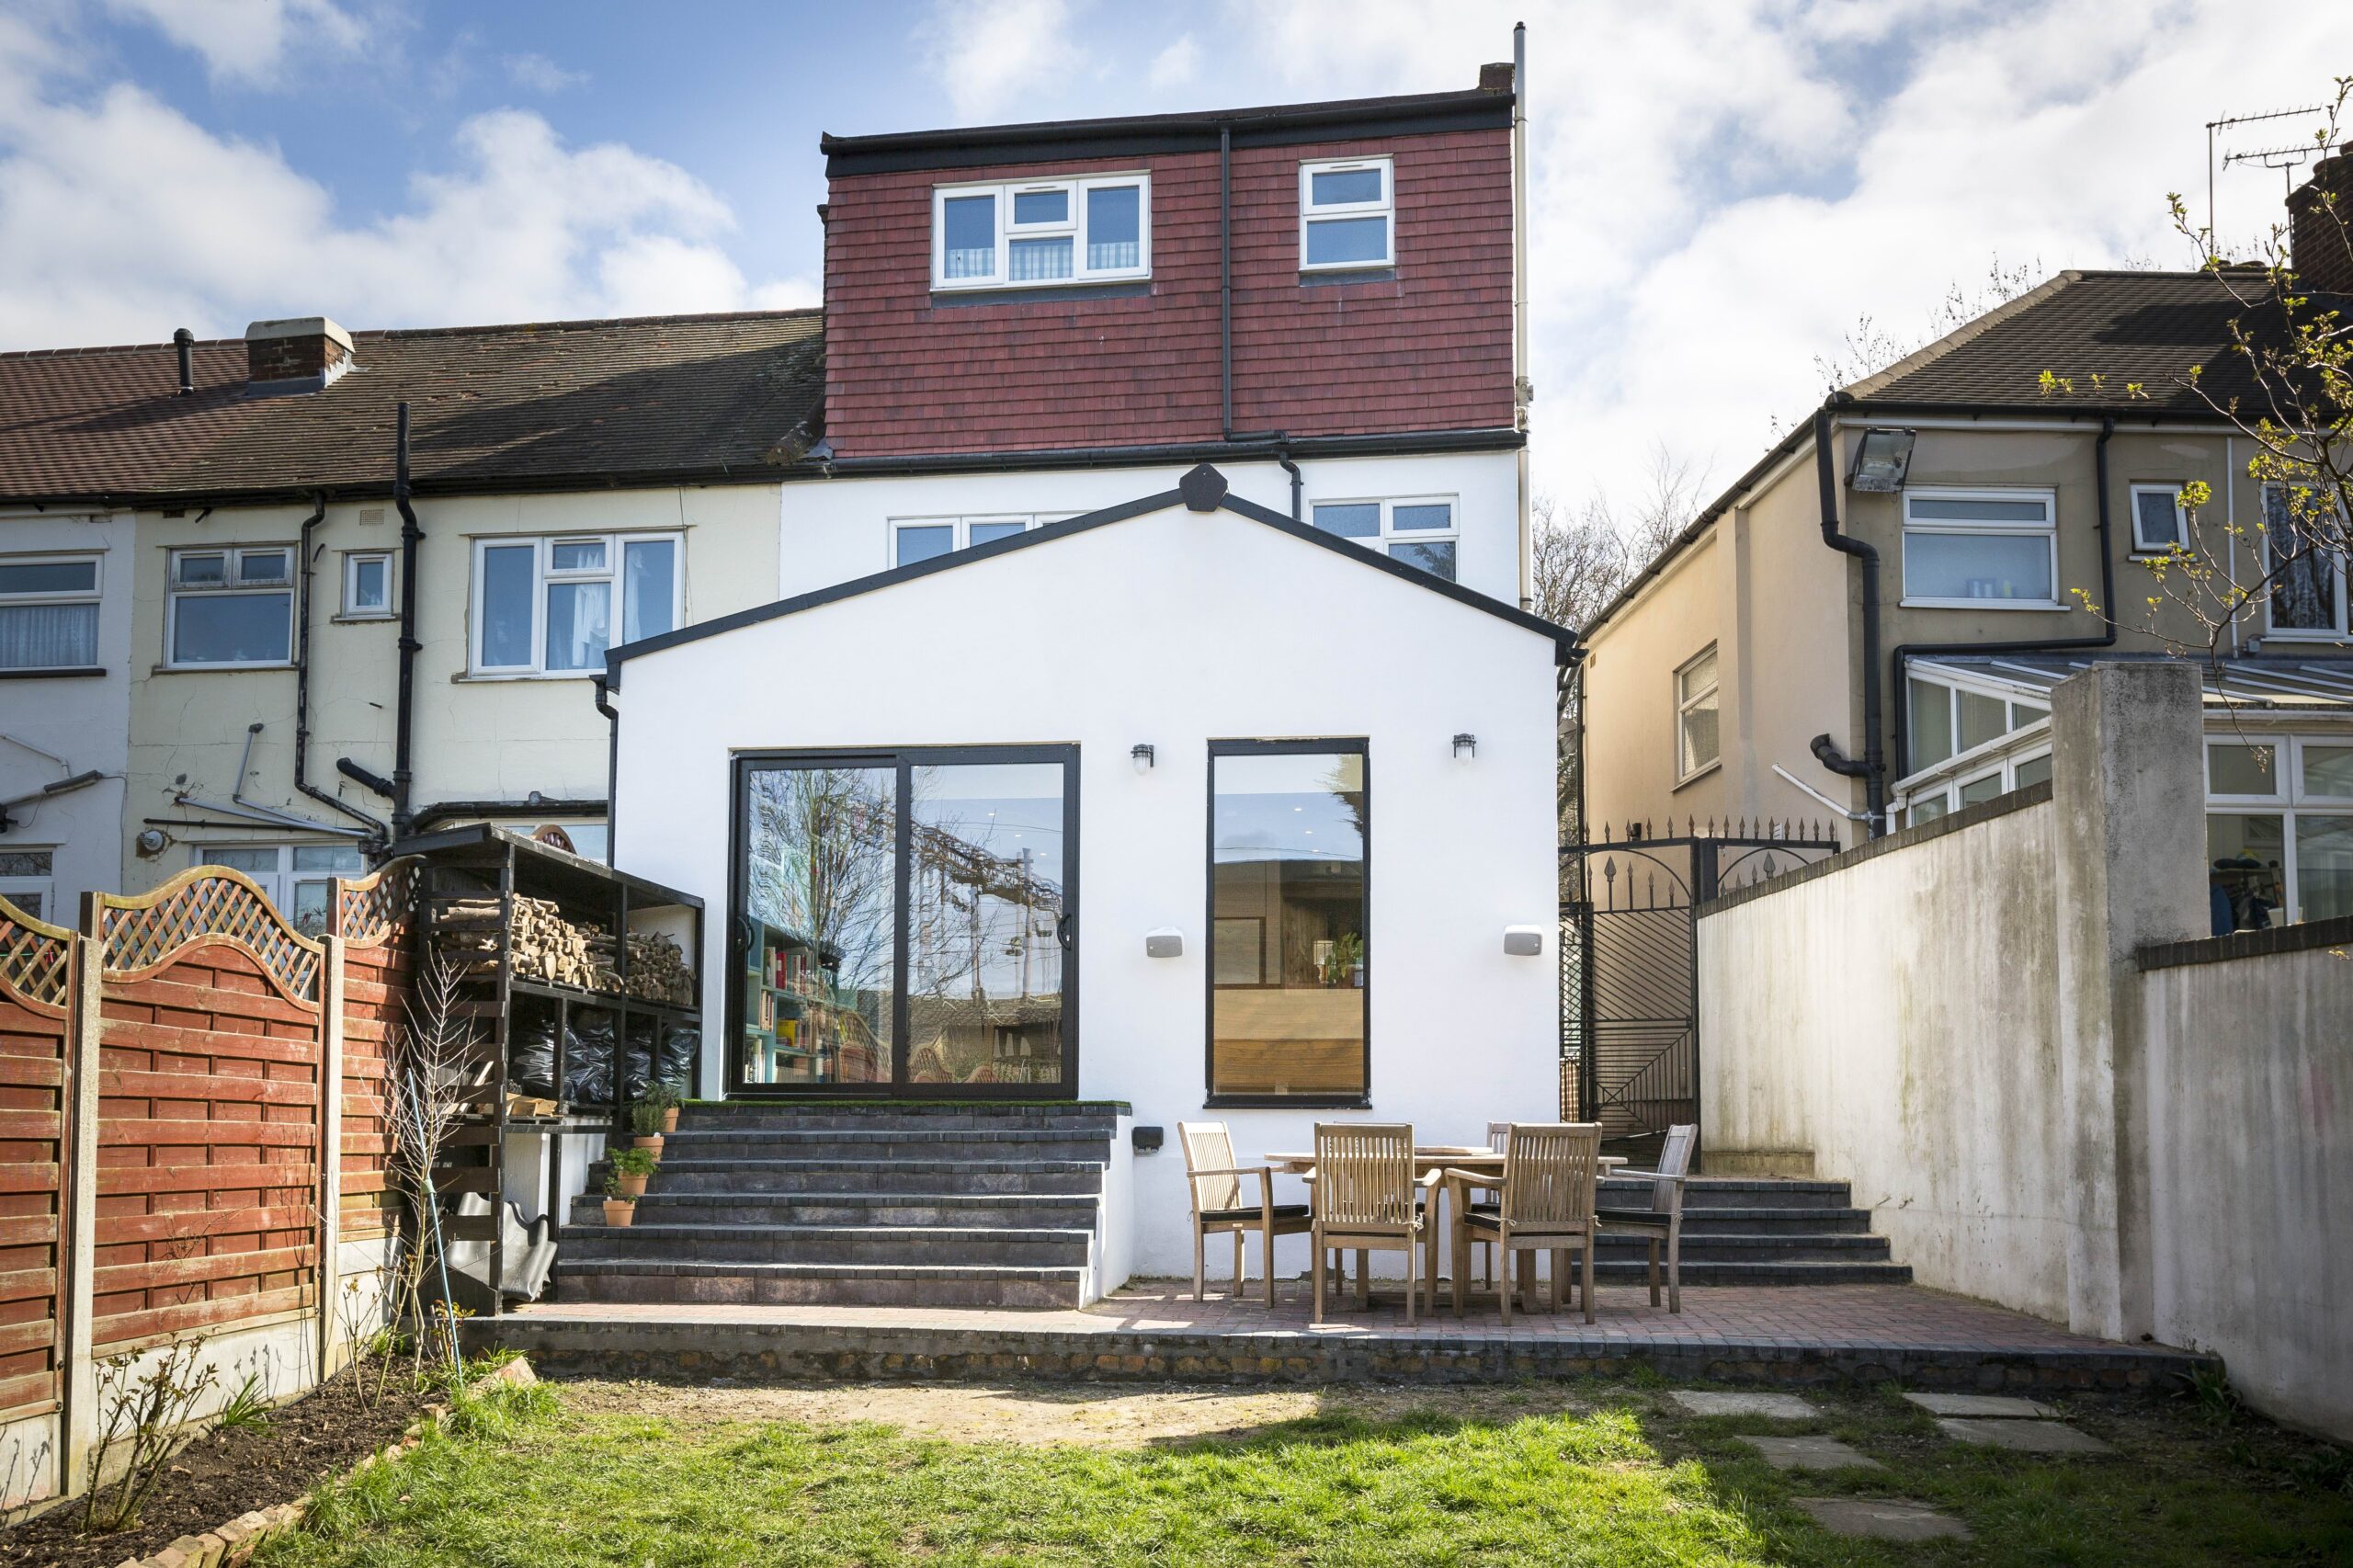
But my house was built in the 1930s. The walls are solid, not cavity walls. When I moved in, it was a doer-upper.
Inside was a mess and outside we had pebbledash. We nicknamed it the Ugly Duckling House and I documented its refurbishment.
We built a rear extension with well-insulated cavity walls. Building regulations insist on it. The new addition was highly insulated, including its roof. The windows were double-glazed and the rooflights were triple-glazed.
But while the ground floor was a building site, I took the opportunity to insulate under the floors throughout.
This meant lifting the floorboards and fitting insulation between the joists everywhere, even at the front of the house.
We did this using 100mm foil-backed foam insulation, held up by wooden battens attached to the joists.
By the time the Ugly Duckling House was a beautiful swan, the whole of the ground floor had insulation beneath it.
But the old walls around the rest of the house were still uninsulated.
So in 2021, I applied for the Green Homes Grant which helped with the cost of insulating them.
You’re essentially making the walls thicker, using a material that gives them a higher thermal mass, they take longer to change temperature, so your home loses less heat in winter but also overheats less in summer.
Insulate inside or out?
You can either insulate walls internally or externally – and there are downsides to both options. Internally means moving skirting boards and radiators, redecorating, and your rooms get a bit smaller.
Externally means moving drainpipes and gutters, extending window sills, and a rendered finish. Would you prefer disruption inside or out?
If you have beautiful brickwork outside but are planning to decorate inside, you’d choose internal insulation. But for me it was a chance to replace my ugly brown pebbledash with a white render, hurray.
The £10,000 Grant covered most of the £11,000 costs but I paid a bit more to use fireproof mineral fibre insulation instead of foam.
The white rendered finish was a huge improvement and something I’d wanted to do anyway.
A survey confirmed that I had changed my home’s Energy Performance Certificate from a D to a C.
I was proud of the change and started to see my energy bills reduce and my home get cosier.
Unfortunately, going from D to C also caused a bump in my heat pump journey. Experts agree that a ‘fabric first’ approach is best – insulate your home well before making the switch to a heat pump.
But unfortunately, becoming a C left me ineligible for the second phase of the Green Homes Grant, which would have supported me to move over to a heat pump. This was frustrating.
Plan ahead for a heat pump
All the while, as a journalist, I was writing about heat pumps. I learned about the tech, interviewed experts about how to do it right. And one expert quote in particular stayed with me…
Architect Bob Prewett explained: “The most important thing is to have a plan for what happens when the boiler stops working.
If you have no plan then you will almost certainly buy another boiler, which will have a life of 12-15 years, and you will be locked into fossil fuel much longer.”
My new kitchen extension had stunning cabinets by Jonathan Maker but I hadn’t given my combi boiler much thought.
I knew it wouldn’t last forever, but I figured another boiler would fit in its place. The cabinets were designed around it. And it was a combi, so there was no hot water tank.
Be prepared for when the boiler dies
In early autumn 2024, my boiler started to struggle.
We were lucky, it didn’t die overnight. But it became temperamental. At its annual service, the engineer said a repair might help but there were no guarantees.
He recommended spending around £3,000 on a new boiler instead. I kept the old boiler limping along for a few more weeks but it died in the autumn.
Bob Prewett’s words were ringing in my ears. I wanted to switch to a heat pump and the house was well insulated, but I didn’t have a plan. I needed a plan and I needed it fast!
In the second article in this series, I’ll talk about that plan, the process of chosing a company and a heat pump, the grant and the cost.
Meanwhile, if you’re interested in heat pumps, take a look at this heat pump explainer, this overview of heat pump installation costs and this article on heat pump running costs.
Main image: Paula Smith
READ MORE:
- 11 homes with heat pumps – inspiration and ideas for all builds
- Heat pumps do work! Here’s why you should consider installing one
- How much does an air source heat pump cost? A guide