Bold Splashbacks: 6 styles we love
Discover everything you need to know about kitchen splashbacks and our favourite bold designs
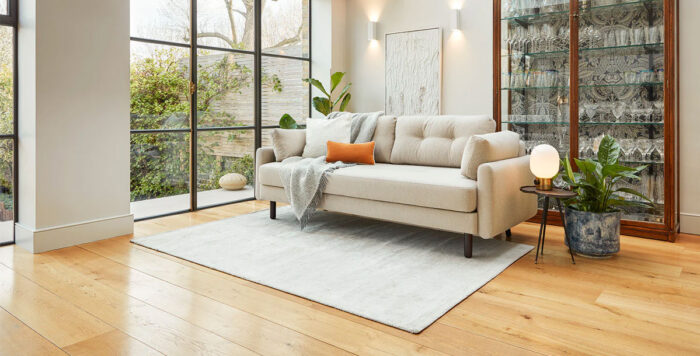
Kitchen splashbacks are a place to make a statement. Where walls, flooring, units and cupboards are best left discrete, the splashback is the place to really put a unique stamp on your kitchen.
Our analysis of the trending kitchen ideas for 2025 resulted in a huge lean towards bold splashbacks, so we wanted to delve deeper into the concept.
We’ve answered the most frequently asked questions about kitchen splashbacks, so you can go into your new kitchen project feeling fully informed.
What is a kitchen splashback?
A kitchen splashback is designed to be an easy clean surface which protects your walls from cooking spills and splashes. They’re also a chance to introduce a different colour, texture or graphic into the design of your kitchen.
Positioning is crucial with a kitchen splashback. You need to make sure it will take the maximum impact of spills, whilst fitting with the space available.
A splashback can be a single panel sitting behind the hob, quite often between the worktop and underside of an extractor. You can also get kitchen splashbacks behind the sink as a practical way to prevent damage and staining when you’re washing the dishes.
Splashbacks can be made to a bespoke size to fit a particular space, or they can come in standard sizes. The standard sizes are usually 600mm wide x 750mm high, or 900mm wide x 750mm high.
How do you fit a splashback?
Kitchen splashbacks can be created in many different materials. These can include glass, acrylic, laminate, stainless steel, and other sheet materials including brass and copper.
You could also have a splashback made from tiles, panelling, or even vinyl wallpaper. The most popular for a DIY installation is usually made from glass, and this can be mirrored, too.
Make sure when choosing your splashback material that it is suitable for where you want it to sit. This is important because some splashback materials wouldn’t be suited to getting hot next to the hob.
Prepping the surface
The amount of effort the fitting will require depends on the condition of your walls – if old tiles have been removed or you’ve ripped off the old splashback panel, you may need to use filler to level any holes.
The surface needs to be non-porous, so that it won’t suck up the adhesive and any fresh plaster might need a coat of PVA or primer before you get started.
When installing a splashback, it’s important to make sure the surface is flat, dry and dust-free and be sure to check the instructions on yours – as it can differ depending on the chosen material.
- Use a spirit level or length of timber to make sure its flat, as if its uneven it can cause the splashback to crack if its made from glass or acrylic.
- Plot out and mark exactly where you want the splashback to go on the wall.
- Choose whether you want it centred above the sink or cooker, or if you’re going full width and remember to make sure it’s straight.
- Allow a gap around the splashback for expansion and sealant.
- Aim for at least 11cm between the splashback and the hob if you have a gas one, and 10cm if it’s electric.
Cutting the splashback to size
It’s best to opt for acrylic, laminate or thin sheet metals like copper or aluminium if you’re cutting your own splashback to size.
Make sure to use a fine blade that’s suited to cutting plastics; you might need to also purchase a specialist power tool to ensure the finish is neat.
Mark out the dimensions on the splashback using tape to the edges so you do not chip the material.
Next, sand down the cut edges and make sure to keep any protective film on the front of the splashback while you work. Cutting stainless steel and glass splashbacks is generally best left to the professionals as it requires more specialist tools.
Fixing to the wall
The most common way to attach regular glass, metal and other sheet-style splashbacks is using double-coated foam tape and low modulus silicone adhesive.
You can also buy splashbacks which have sticky backing so you don’t need the extra adhesive.
Apply strips of foam tape to the top, bottom, sides and middle of the back of your splashback. Using a silicone gun, apply adhesive to the areas in between, it’s best to aim for coverage with a 2-3cm wide gap in between.
Remove the protective strip from the foam tape and firmly attach the splashback to the wall, apply gentle pressure evenly across the splashback ensuring it’s straight.
Once the adhesive is cured, remove any protective foam and wipe it down with a clean, damp cloth.
Remove any masking tape and apply a thin line of silicone sealant around the edges. Make sure you use a bathroom or kitchen grade silicone to ensure a watertight seal and prevent mildew stains.
If your splashback is made from glass, acrylic, stainless steel or laminate, it won’t need any further treatment to protect from splashes. However, metallic splashbacks may need an extra sealant coating.
We would always recommend working with an expert on a splashback installation where possible to ensure the best possible outcome.
Can a splashback go over tiles?
Yes, a kitchen splashback can be fitted over tiles. Many people find tiles get unwanted stains and go off colour where a splashback isn’t installed so we would always recommend installing one over the top – the best option is to go for glass or acrylic.
Glass is a great option as its easy to clean and you won’t need any tile grout. Simply use neutral cure silicone to install over your existing wall tiles.
Both glass and acrylic will sit nicely in front of the tiles so it avoids the difficult process of removing them.
How high should a splashback go?
As mentioned previously, if you’re buying a standard size kitchen splashback, the sizes are 600mm wide x 750mm high, or 900mm wide x 750mm high.
We do recommend ordering made to measure if you have a specific height in mind – but the idea is that it goes up as high as any cupboards or fixtures go in that area.
Or alternatively, if you’re installing a splashback in front of tiles, as high as you will need before the tiling can be shown again.
How much does a splashback cost?
Depending on the type of splashback you go for, the cost can drastically differ across materials, brands and styles.
The current estimated cost of a kitchen splashback ranges from £250 to £3,400.
Can glass splashback crack from heat?
Yes, it is possible for a glass splashback to crack from over exposure to very hot temperatures. Ideally, a glass splashback needs to be created with toughened glass as this can withstand temperatures up to 400C.
The other reason a glass splashback can crack is the proximity to an open gas flame – because the repeated exposure of heating and cooling can cause glass to crack. We recommend keeping the splashback 100mm back from the flames of your hob if possible.
Which splashback for kitchens?
There are a huge selection of materials and styles of splashback to choose from.
As 2025 is the year of the bold splashback, here are ten of our favourite bold splashback options for kitchens using different materials…
1. Porcelain
Laminam has introduced three new colours into its I Naturali Series this year, which makes it even more desirable as a bold splashback option.
The stunning pattern instantly makes you think of natural beauty, and as a splashback is available in a polished or soft touch finish.
Prices start from £110 per sqm for 3mm thickness, £180 per sqm for 5mm thickness, £410 per sqm for 12mm thickness, and £520 for 20mm thickness.
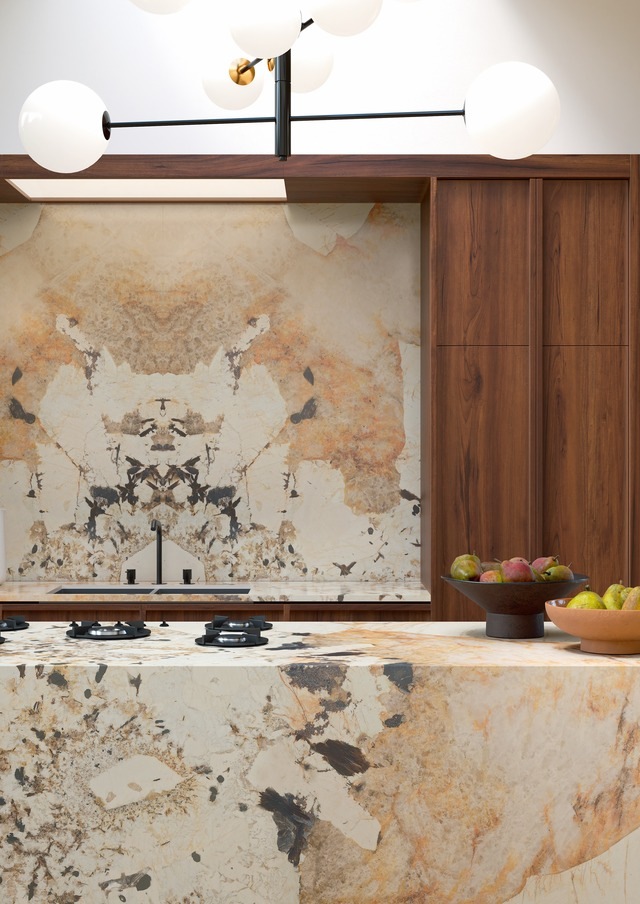
Photo: Marcello Bocchieri for Laminam
- I Naturali Series splashback and worktops – browse the range here
2. Modern Victorian tiles
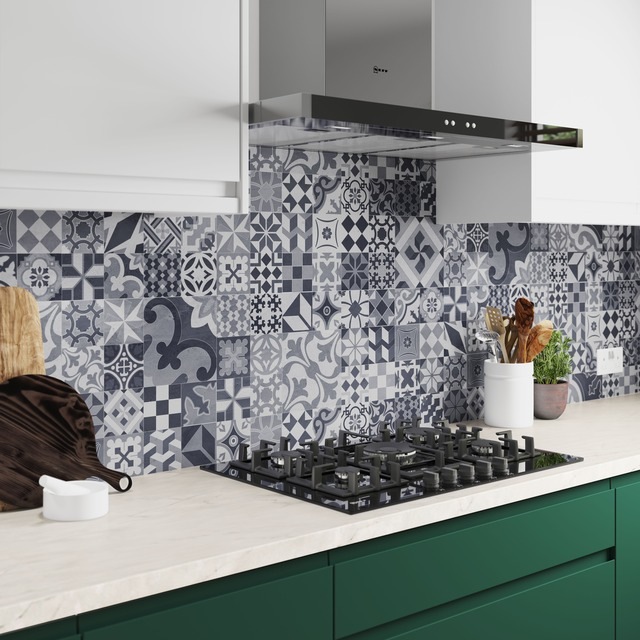
Photo: Bushboard
- Modern Victoria Alloy splashback, from £110 for 800x600x4mm from Bushboard – find out more and browse retailers
3. Decorative glass
This stunning metallic glass splashback from Emma Britton is something special.
Emma creates bespoke, designer splashbacks with her signature floral and modern patterns which truly transform kitchen spaces.
The pretty and practical glassware is perfect for modern kitchens and we absolutely love the colours in Antique Peacock – part of Emma Britton’s recent Heritage Luxe collection.
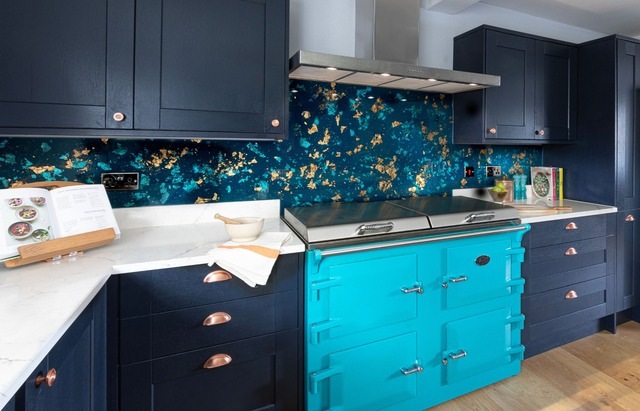
Photo: Emma Britton
- Antique Peacock splashback design from Emma Britton – find out more and order here
4. Make it marble
This stunning marble splashback blends in beautifully with the Ivory shaker kitchen set up by Olive & Barr, but it also adds a pop of interest to the otherwise clean kitchen design.
It makes the heart of the kitchen pop and is perfectly safe to be closer to the hob whilst still displaying a stunning effect.

Photo: Olive & Barr
- Browse the shaker kitchen options available at Olive & Barr – shop shaker kitchens
5. Mosaic porcelain
These durable porcelain tiles are stylish with a shining gloss finish and the stunning blue will make a really statement for your splashback.
The stunning two-tone blue is exceptionally popular this year, and we love the Japandi style.
The two tone really adds depth and character to the walls, with its 296x299mm format with 8mm thickness.
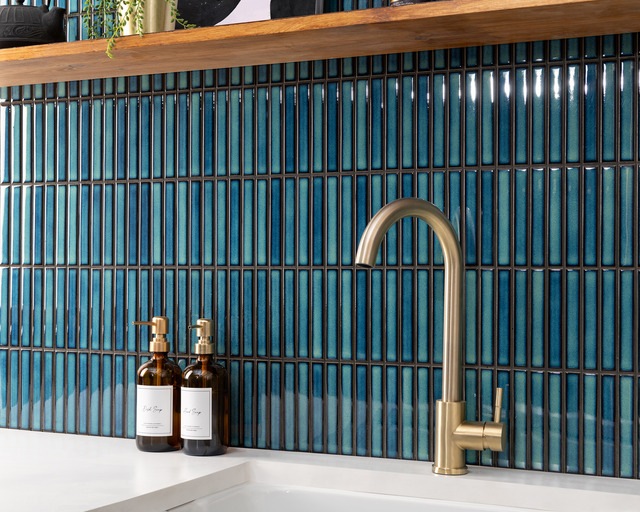
Photo: Walls and Floors
- Spirit Ocean Mixed Blue Kitkat Mosaic Porcelain Wall Tiles £9.95 per sheet – buy it here
6. Aluminium panels
This range of aluminium-based panels are designed for durability, offering clear resistance to fire, steam and water.
They’re also shatterproof, crackproof and anti-bacterial —perfect for installation behind most popular cookers.
These panels are easy to install and maintain, with a grout-free, non-porous surface that provides a sleek, seamless finish, combining durability and affordability.
Photo: AluSplash
- Browse the MilkyBar collection at AluSplash here
Read more: